Ever tried to create an AI influencer and ended up with a completely different face every single generation? Yeah, me too. I spent weeks getting random results until I figured out what actually works.
I'm Artem, and I've been experimenting with AI-generated characters since the early Midjourney days. After creating hundreds of images trying to get consistent results, I finally cracked the code—and it's not what most tutorials tell you. The secret isn't better prompts. It's structured prompts.
As of January 2026, here's the exact workflow I use to create photorealistic, consistent AI influencer content. I'm using WritingMate for this tutorial since it has all the models I need in one place, but you can use any AI influencer generator that supports similar models.
And yes, people are actually making money with this. Some claim $5k+ per month:
AI influencers make me $5k a month
byu/throwaway_aiincome inOnlineIncomeHustle
The Tools You'll Need
- Nano Banana Pro — Google's Gemini 3 Pro image model. It's ridiculously good at photorealistic humans.
- Kling 2.6 — For image-to-video with native audio. This is what brings your character to life.
Both are available in WritingMate, or you can grab them through Replicate, Fal.ai, or directly via their APIs.
Fully synthetic AI influencers now got an update on Photo AI
— @levelsio (@levelsio) April 25, 2025
They're now fully consistent, meaning they don't change in looks, and are real consistent characters now
Before I used prompts to define them which resulted in more variations in output
But now what I do:
- User designs the AI influencer based on looks
- Robot generates photos for that look with a prompt
- Robot uses Instant Character to generate 20 consistent looking training photos and put it into a ZIP
- Robot upscales all those pics
- Robot then actually trains that ZIP as an AI model as if it was a real human using the site
Step 1: Create Your AI Influencer's Base Image
Here's the thing most people get wrong: they write prompts like they're describing a photo to a friend. "A pretty woman in a coffee shop" isn't going to cut it if you want the same woman to show up next time.
The trick? JSON prompts. They're more structured, which means you can copy-paste exact details across generations.
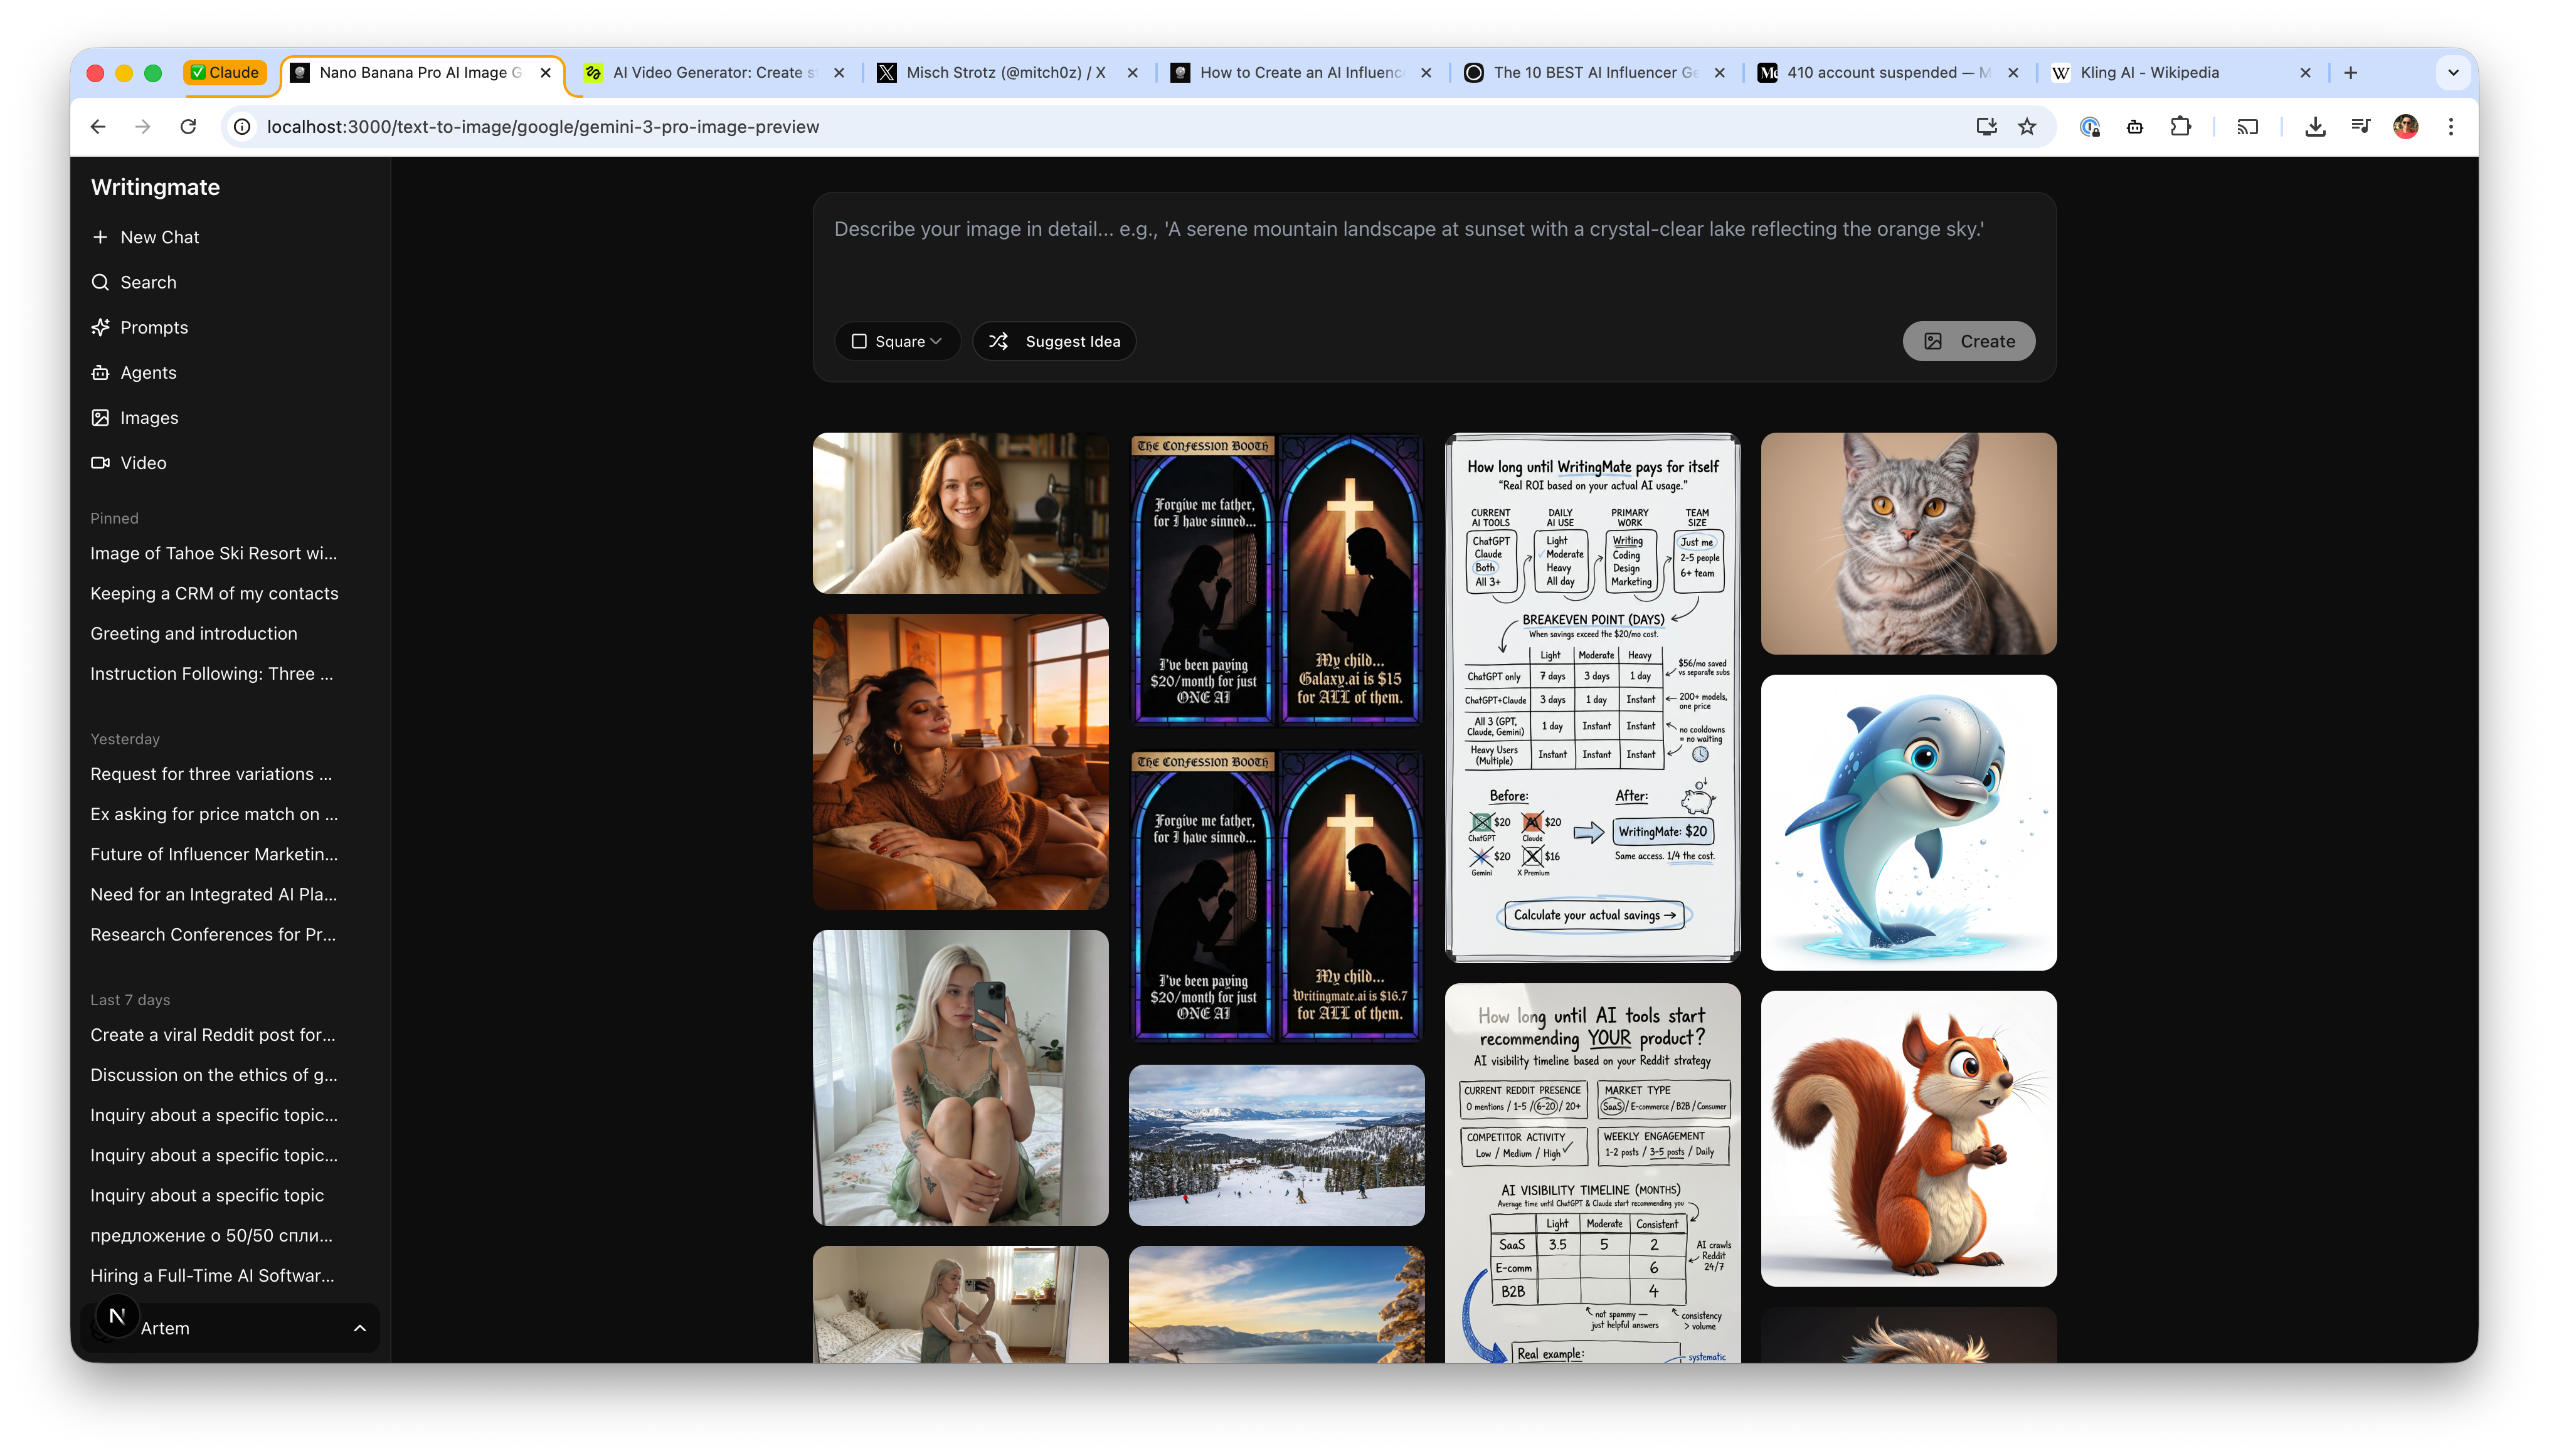
Here's the WritingMate Interface
This is where you'll paste your JSON prompt. Select Nano Banana Pro from the model dropdown:
The JSON Prompt Structure
Here's the exact prompt that generated the cover image of this post. I've tested it across 20+ generations—17 came out with the same recognizable face. That's way better than the 2-3 out of 20 I was getting with plain text prompts.
{
  "scene_type": "Indoor lifestyle portrait",
  "environment": {
    "location": "Sunlit bedroom",
    "background": {
      "bed": "White linen bed with floral sheets",
      "decor": "Minimal plants and neutral decor",
      "windows": "Sheer-curtained window",
      "color_palette": "Soft whites, sage green accents"
    },
    "atmosphere": "Quiet, cozy, intimate"
  },
  "subject": {
    "gender_presentation": "Feminine",
    "approximate_age_group": "Young adult",
    "skin_tone": "Fair",
    "hair": {
      "color": "Platinum blonde",
      "style": "Long, straight, loose"
    },
    "facial_features": {
      "expression": "Introspective, calm",
      "makeup": "Natural, barely-there"
    },
    "body_details": {
      "build": "Slim to average",
      "visible_tattoos": [
        "Botanical arm tattoos",
        "Small thigh tattoo"
      ]
    }
  },
  "pose": {
    "position": "Seated on bed",
    "legs": "Knees drawn close to chest",
    "hands": "One hand holding phone, other wrapped loosely around legs",
    "orientation": "Front-facing mirror selfie"
  },
  "clothing": {
    "outfit_type": "Soft sleepwear dress",
    "color": "Muted sage green",
    "material": "Breathable semi-sheer fabric",
    "details": "Thin straps, subtle lace edging"
  },
  "styling": {
    "accessories": ["Delicate necklace"],
    "nails": "Natural nude",
    "overall_style": "Minimal, soft, feminine"
  },
  "lighting": {
    "type": "Natural daylight",
    "source": "Window",
    "quality": "Even and diffused",
    "shadows": "Very soft"
  },
  "mood": {
    "emotional_tone": "Peaceful, introspective",
    "visual_feel": "Calm, personal"
  },
  "camera_details": {
    "camera_type": "Smartphone",
    "lens_equivalent": "26mm",
    "perspective": "Mirror selfie",
    "focus": "Clean subject clarity",
    "aperture_simulation": "f/1.8 look",
    "iso_simulation": "Low ISO",
    "white_balance": "Daylight neutral"
  },
  "rendering_style": {
    "realism_level": "Ultra photorealistic",
    "detail_level": "Natural skin texture, realistic light falloff",
    "post_processing": "Soft highlights, gentle contrast",
    "artifacts": "None"
  }
}
Copy this into Nano Banana Pro, hit generate, and you'll get something like this:

Why JSON Prompts Work Better
Here's why I swear by this approach:
- Consistency — Copy the
subjectblock exactly every time and you'll get the same person - Granular control — Want to change just the outfit? Change one block, not the whole prompt
- Easier variations — Swap environment/clothing while keeping identity locked
- Reproducible — Save it as a template file and you're set for months
Step 2: Generate Content Variations
But wait—how do you make different outfits without getting a totally different person? That's the million dollar question.
The trick is keeping the subject block identical. Only change these sections:
scene_typeenvironmentposeclothinglightingmood
Coffee Shop Variation
Same person, different vibe. Notice how the subject block is identical:
{
  "scene_type": "Casual cafe portrait",
  "environment": {
    "location": "Minimalist coffee shop",
    "background": {
      "setting": "Window seat with street view",
      "decor": "Exposed brick, wooden tables",
      "color_palette": "Warm browns, cream tones"
    },
    "atmosphere": "Relaxed, morning quiet"
  },
  "subject": {
    "gender_presentation": "Feminine",
    "approximate_age_group": "Young adult",
    "skin_tone": "Fair",
    "hair": {
      "color": "Platinum blonde",
      "style": "Long, straight, loose"
    },
    "facial_features": {
      "expression": "Soft smile, looking at camera",
      "makeup": "Natural, barely-there"
    },
    "body_details": {
      "build": "Slim to average",
      "visible_tattoos": ["Botanical arm tattoos"]
    }
  },
  "pose": {
    "position": "Seated at table",
    "hands": "Both hands wrapped around ceramic coffee cup",
    "orientation": "Three-quarter angle"
  },
  "clothing": {
    "outfit_type": "Oversized knit sweater",
    "color": "Cream white",
    "material": "Soft wool blend"
  },
  "lighting": {
    "type": "Natural daylight",
    "source": "Large window to the side",
    "quality": "Soft, diffused morning light"
  },
  "camera_details": {
    "camera_type": "Mirrorless",
    "lens_equivalent": "35mm",
    "aperture_simulation": "f/2.0 look",
    "perspective": "Eye level"
  },
  "rendering_style": {
    "realism_level": "Ultra photorealistic",
    "post_processing": "Warm color grade, soft contrast"
  }
}
Fitness Variation
Want workout content? Same face, athletic setting:
{
  "scene_type": "Athletic lifestyle portrait",
  "environment": {
    "location": "Modern home gym or yoga studio",
    "background": {
      "setting": "Clean, minimal workout space",
      "decor": "Large windows, plants, natural wood",
      "color_palette": "White, sage green, natural tones"
    },
    "atmosphere": "Energetic but calm, morning wellness"
  },
  "subject": {
    "gender_presentation": "Feminine",
    "approximate_age_group": "Young adult",
    "skin_tone": "Fair",
    "hair": {
      "color": "Platinum blonde",
      "style": "Long, pulled back in low ponytail"
    },
    "facial_features": {
      "expression": "Confident, slight smile",
      "makeup": "None, natural glow"
    },
    "body_details": {
      "build": "Slim to average, athletic",
      "visible_tattoos": ["Botanical arm tattoos"]
    }
  },
  "pose": {
    "position": "Standing with yoga mat",
    "hands": "Holding rolled yoga mat",
    "orientation": "Three-quarter angle facing camera"
  },
  "clothing": {
    "outfit_type": "Matching athletic set",
    "color": "Sage green",
    "material": "Technical fabric",
    "details": "Sports bra and high-waisted leggings"
  },
  "lighting": {
    "type": "Natural daylight",
    "source": "Large windows",
    "quality": "Bright, even, flattering"
  },
  "camera_details": {
    "camera_type": "Mirrorless",
    "lens_equivalent": "50mm",
    "aperture_simulation": "f/2.8 look"
  },
  "rendering_style": {
    "realism_level": "Ultra photorealistic",
    "post_processing": "Clean, vibrant, healthy skin tones"
  }
}
Step 3: Bring Your AI Influencer to Life with Video
Okay, here's where it gets fun. Still images are great, but video? That's what separates amateur AI influencers from ones that actually fool people.
Take your best generated image and turn it into video using Kling 2.6.
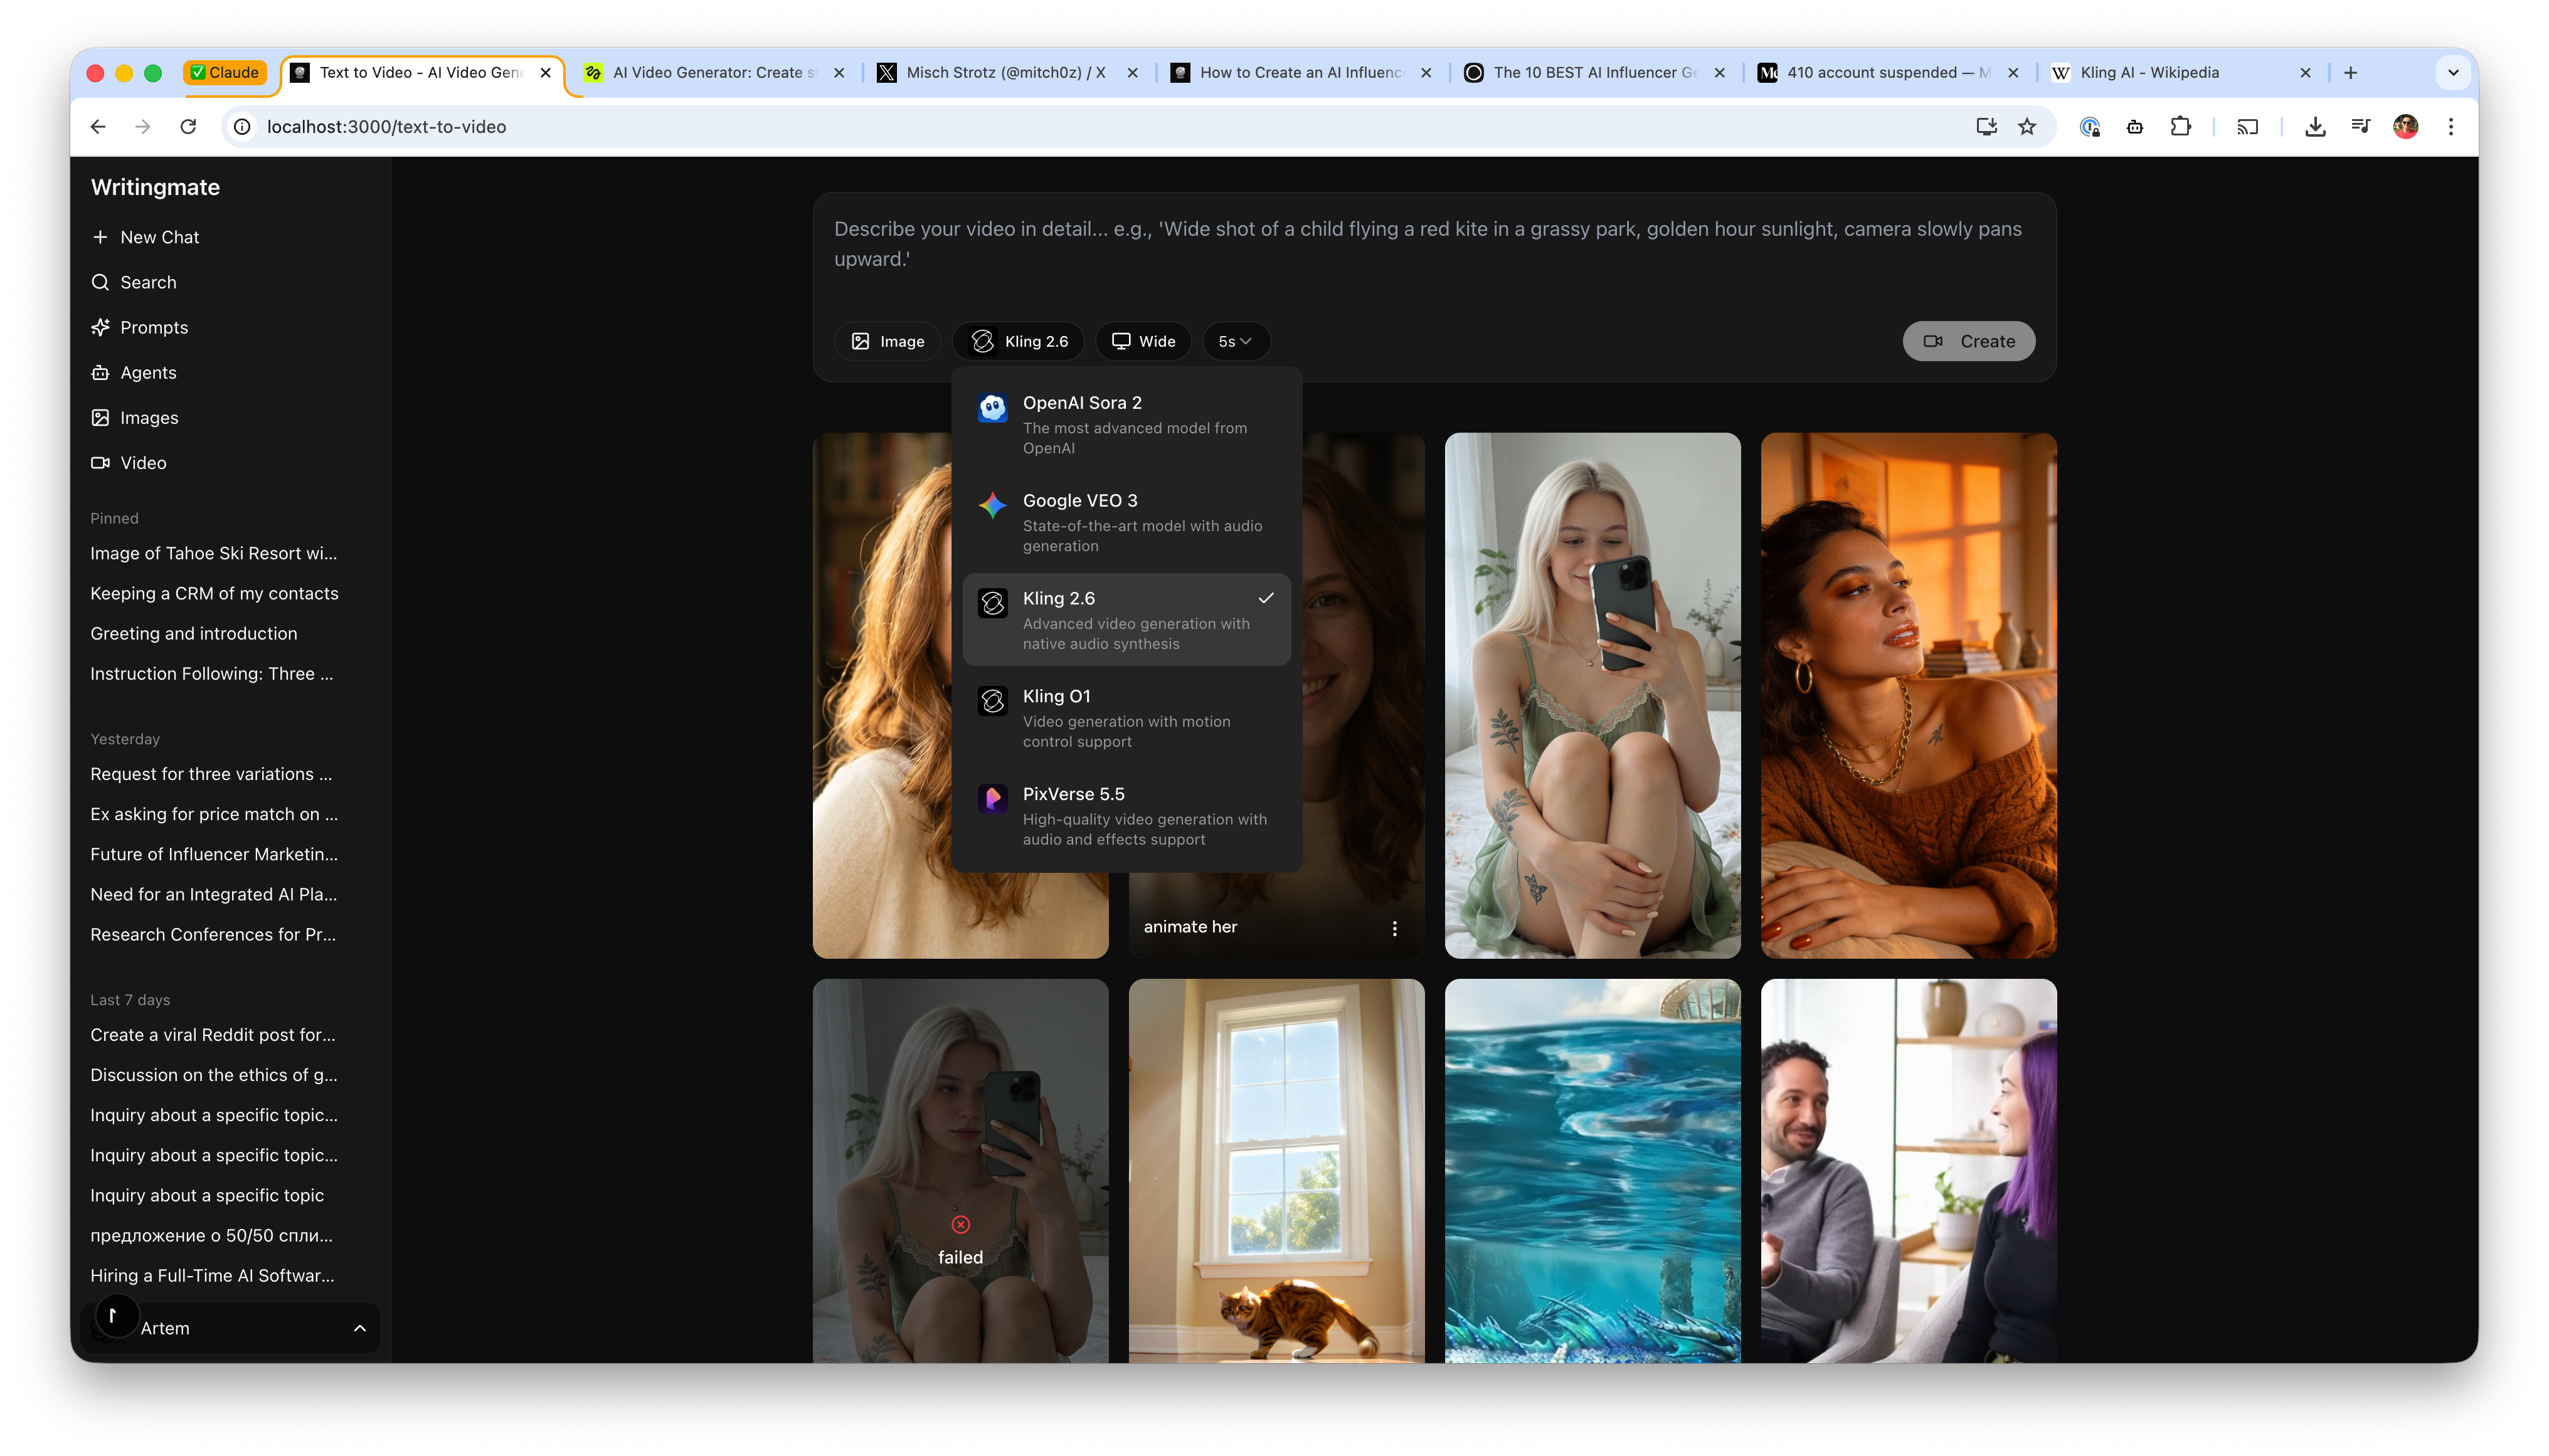
The Video Interface
Here's what the Kling 2.6 interface looks like in WritingMate. Upload your image, write a simple prompt, and hit create:
How to Create Video
- Upload your generated image to Kling 2.6 (in WritingMate: Text to Video → select Kling 2.6)
- Use a simple animation prompt
- Select duration (5-10 seconds) and aspect ratio (9:16 for Reels/TikTok)
Video Prompts That Actually Work
Here's the crazy part—the video prompts are way simpler than the image prompts. Like, embarrassingly simple.
Basic animation:
animate thisThat's literally it. Kling handles the natural movement—blinking, subtle breathing, hair movement. I couldn't believe it worked the first time I tried it.
Smile reveal:
animate this, slight smile, gentle head turn to the rightCoffee sip:
animate this, brings cup to lips, takes a sip, lowers cupTalking head:
animate this, talking to camera with natural expressions, subtle hand gesturesVideo Result
Here's what came out of the "animate this" prompt. No fancy instructions, just those two words:
Video Settings I Use
- Model: Kling 2.6 (it's got native audio generation—huge plus)
- Duration: 5 or 10 seconds (5s for stories, 10s for feed posts)
- Aspect ratio: 9:16 for TikTok/Reels, 16:9 for YouTube
Building Your Content Library
Before you post anything, build up a bank of content. Trust me, you'll burn through material faster than you think.
Here's what I recommend:
- 10-15 different still images (various outfits/settings)—you'll need these
- 5-8 short video clips
- Mix of close-ups and full body shots
- Different times of day and lighting conditions
This gives you material to post consistently without generating new content for every single post.
Tips for Maintaining Consistency
| Element | Keep Constant | Can Change |
| Physical features | Eye color, hair color, skin tone, tattoos | Hairstyle (up/down) |
| Camera style | Stick to 2-3 "virtual cameras" | Angle, distance |
| Lighting | General style (natural vs studio) | Time of day, direction |
| Post-processing | Overall color grade | Mood-specific tweaks |
Template: Save Your Character
Create a file called my-influencer.json with your base character. Here's the structure I use:
{
  "subject": {
    // YOUR CHARACTER DEFINITION
    // NEVER CHANGE THIS SECTION
  },
  "environment": {
    // CHANGE PER SHOT
  },
  "pose": {
    // CHANGE PER SHOT
  },
  "clothing": {
    // CHANGE PER SHOT
  }
}
When creating new content, copy the subject block and build new prompts around it. It's that simple.
Try It Yourself
Here's the workflow in a nutshell:
- Create your character's JSON template with detailed physical features
- Generate base images with Nano Banana Pro
- Create variations by swapping environment/clothing/pose blocks
- Animate your best images with Kling 2.6 using simple prompts like "animate this"
- Build a content library before posting
Both Nano Banana Pro and Kling 2.6 are available in WritingMate, or you can access them through other platforms. The important thing isn't which tool you use—it's the structured prompt approach that makes consistency possible.
Got questions? Drop them below. I'm always happy to share more prompts.
Artem
Frequently Asked Questions
Sources
- Nano Banana Pro Image Generation - Google AI for Developers
- Kling AI - Wikipedia
- Nano Banana Pro - WritingMate
- Text to Video - WritingMate
- AI Video Generation Documentation - WritingMate
- The 10 BEST AI Influencer Generators (2026) - HyperLush
- AI influencers make me $5k a month
- u/throwaway_aiincome
- OnlineIncomeHustle
- April 25, 2025
Written by
Artem Vysotsky
Ex-Staff Engineer at Meta. Building the technical foundation to make AI accessible to everyone.
Reviewed by
Sergey Vysotsky
Ex-Chief Editor / PM at Mosaic. Passionate about making AI accessible and affordable for everyone.


