
Create a Custom Agent
A custom Agent is a reusable AI assistant with its own instructions, model, response settings, knowledge files, integrations, and conversation starters.
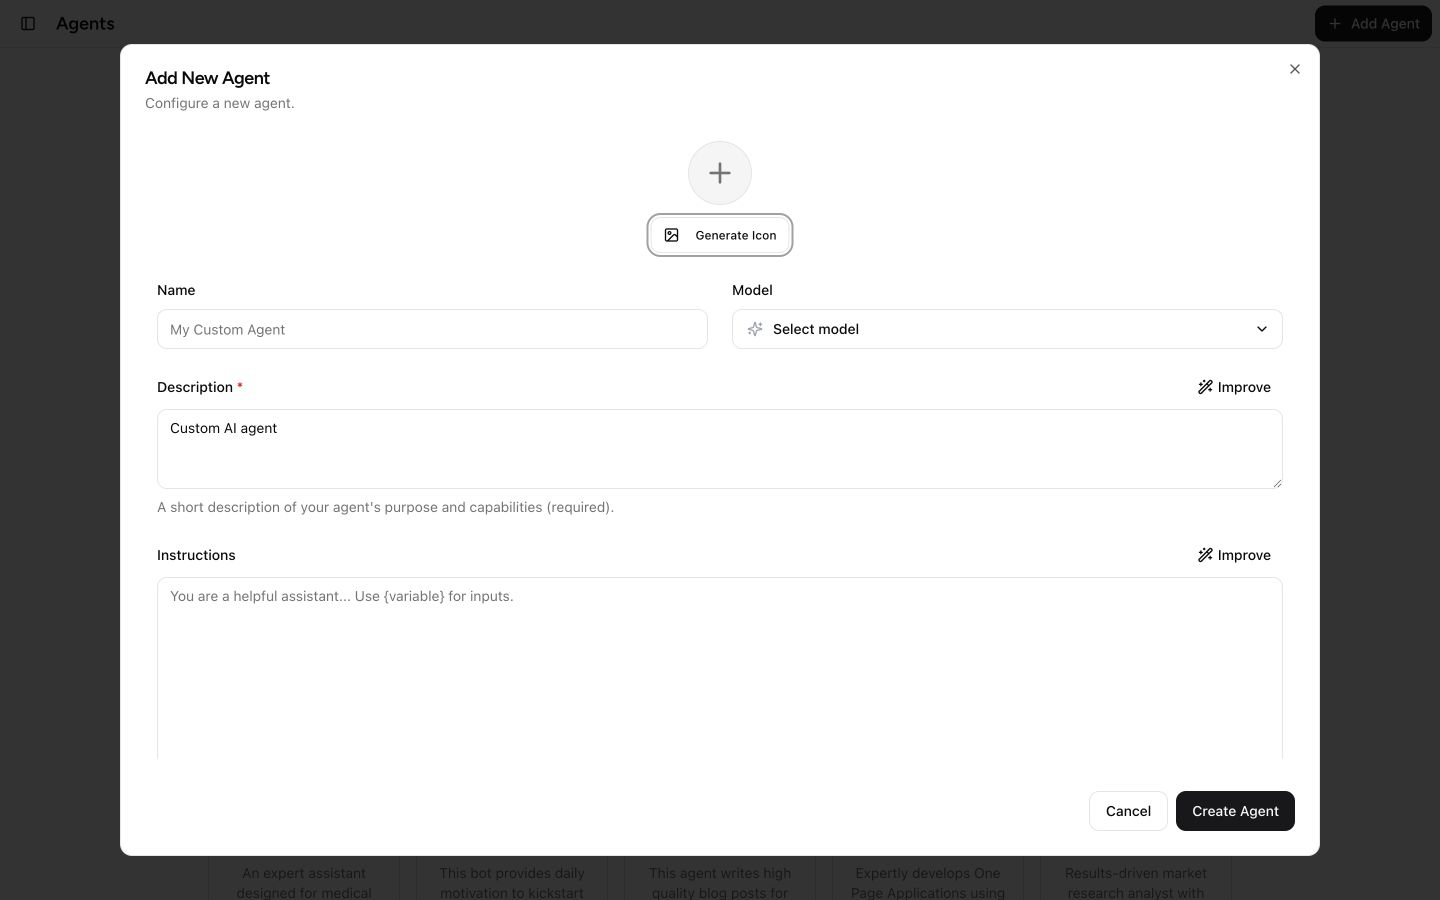
The desktop Agent form. Available models and integrations depend on your workspace.
Open the Agent form
- Select Agents in the sidebar.
- Select Add Agent.
- Complete the Add New Agent form.
Set the Agent's identity and behavior
- Icon (optional): Upload an image, or enter the Agent's name and select Generate Icon.
- Name: Enter a clear name for the Agent.
- Model: Select one model. Model availability depends on your plan and workspace configuration.
- Description: Summarize the Agent's purpose and capabilities. This field is required.
- Instructions: Explain how the Agent should respond, what it should do, and any limits it must follow. This field is required.
Use Improve beside Description or Instructions to rewrite text you have already entered. Review the result before saving it.
Good instructions usually include the Agent's role, intended audience, preferred output format, and rules for using tools or knowledge files. Do not place passwords, API keys, Developer Keys, or other credentials in the instructions.
Adjust response settings
- Temperature ranges from 0 (more precise and consistent) to 1 (more varied and creative).
- Context Length controls how much conversation and reference material the model can consider at once. The range starts at 1K tokens and ends at the selected model's limit.
Context length is not permanent memory. When a conversation exceeds the selected limit, older context may no longer be included.
Add Knowledge Files
Select Upload Files to give the Agent reference material such as policies, product documentation, or structured data.
Knowledge Files:
- upload immediately, before you select Create Agent;
- are stored as private files in your current workspace;
- can be up to 10 MB each; and
- support TXT, CSV, JSON, Markdown, PDF, DOCX, XLS, XLSX, XLSM, XLSB, HTML, XML, and RTF files.
Removing a file from the form detaches it from the Agent's knowledge list. It does not confirm that the uploaded source file was deleted from storage. Avoid uploading secrets or unnecessary personal data.
Enable Agent Integrations
Under Agent Integrations, enable only the capabilities the Agent needs:
- Core Integrations provide built-in tools available to your account.
- Canvas provides document creation and editing tools.
- Image Generation lets you choose one image generator at a time.
- MCP lists tools from configured Model Context Protocol (MCP) servers. You can enable an entire server or individual tools.
Available integrations depend on your model, plan, and configured services. Select Refresh Tools after adding or changing an MCP server.
An enabled integration can read or change data in a connected service according to that service's permissions. Use the minimum access needed, and test actions with non-sensitive data first.
Add Conversation Starters
Conversation starters are optional example requests shown when someone opens the Agent. Enter a starter and press Enter, or select the plus button. Select an existing starter to remove it.
Use specific starters that demonstrate the Agent's purpose, such as:
Summarize this policy for a new employee.Turn these notes into a customer-ready email.Compare the options in the attached spreadsheet.
Create and test the Agent
- Review the form, including uploaded files and enabled integrations.
- Select Create Agent.
- Open the Agent and test its instructions, knowledge, and tools with a few representative requests.
- Return to Agents and edit it if the results need adjustment. The edit form provides Save Changes and Delete actions.
New custom Agents are saved as private by default. The current Add New Agent form does not provide a Public or Private selector, so do not assume the Agent is publicly available.